In the early 2000’s, like many others web enthusiasts, I learnt how to build basic websites, I played around with HTML and CSS; it was fun. Then life happened. A few years go I re-started to learn programming, I did a Python course but I forgot about must stuff, I never applied it.
This year, I taught myself the basics of programming with youtube videos, an Udemy course, a book, and by asking questions to my colleagues at work: developers, engineers and data-scientists. Access to their knowledge and patience is invaluable. Some of them recommended to apply the lessons I learned by doing a project: the famous learning by doing technique so I decided to mix some of my interests: photography, animation, storytelling, video editing and programming.
The first phase of the project was a playful one. One of the orchids of my apartment was about to bloom so I took the chance and started taking pictures.
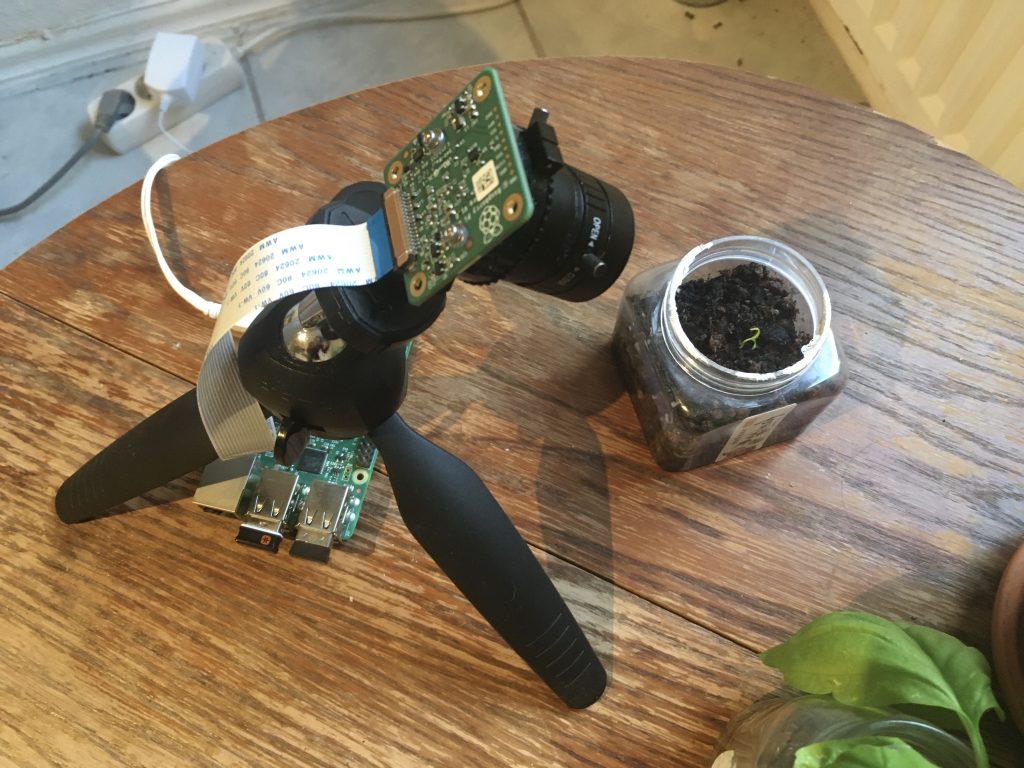
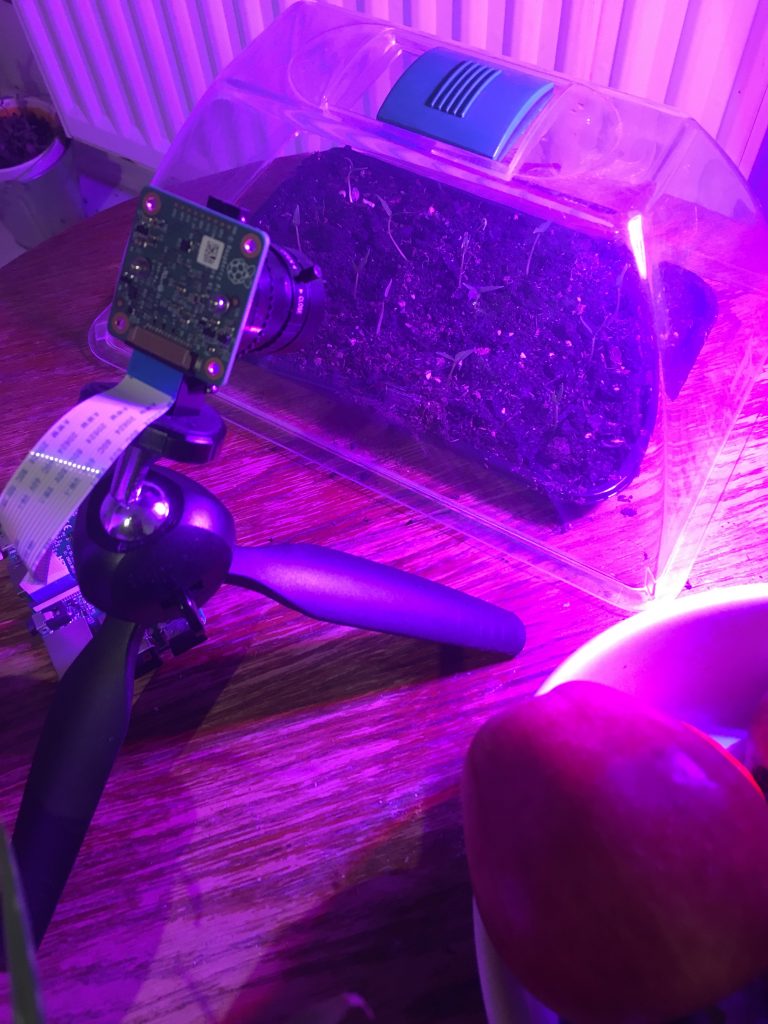
In the second phase, I was more systematic. First, I set up the scene: seeds, light, Raspberry Pi and Camera. Ready, set, action! It turns out, that more than 1 seed germinated. I honestly wasn’t expecting them to grow, it’s autumn 2020 in Germany, there’s little sunlight and temperature is decreasing. So, I had to modify the scene after the first seeds grew.


This is the raw unedited result of the first 20 days.
Here’s a brief description of how I did it:
I used a Raspberry Pi 3 B, Raspberry Pi HQ Camera with a 6mm lens and a Macbook to remotely access the Raspberry Pi. I accessed with VNC viewer.
Then, in the Raspberry Pi I Command Line I used the below command so the Raspberry Pi Camera would take a 1920×1080 picture every 10 minutes, for a period of X hours.
raspistill -w 1920 -h 1080 -t 172800000 -tl 600000 -o frame%04d.jpg
The example above shows -t 172800000 milliseconds (48 hours) for the duration of the session and -tl 600000 milliseconds (10 minutes) which was the frequency in which I took every picture. This meant that every other day I ran this command in the Raspberry Pi and waited, then every night I turned on the UV light. That’s why you see the colour purple in the video. You’ll see some black frames in the video, those are nights which I forgot to turn on the light.
To create the video, I installed ffmpeg with homebrew.
$ brew install ffmpeg
In macOS terminal, I used ffmpeg and I ran the below command in the macOS terminal to join the frames and to create a video. This line saved me a bunch of time.
ffmpeg -r 24 -f image2 -s 1920x1080 -i frame%04d.jpg -vcodec libx264 -crf 15 test.mp4
This exercise is not over. There are 10 days to go and some editing to do. My end goal is to write a script that can reduce the amount of manual work. Let’s see.
Update: 2020-11-30
It’s ready. The below video shows 720 hrs or 30 days of photographs and this is the edited result, I cut out the black frames, increased the speed and I chose a popular musical piece to add some drama.
I was able to run a python script to join the last 10 days of frames. Here’s the last piece of what I learned.
I wanted to run ffmpeg with Python, to do so, first I installed virtual env.
$ pip install virtualenv
Then I accessed the folder where I wanted to to create the virtual environment, created an environment and finally activated it.
Access the folder in macOS terminal
$ cd /Users/…/….
Create the virtual environment
$ virtualenv NAME_OF_ENV
Activate the virtual environment
$ source NAME_OF_ENV/bin/activate
For the above, I found this tutorial useful.
My goal was to run a script in python, so I install a python wrapper for ffmpeg called ffmepg-python.
I then ran the below python script in macOS terminal
import ffmpeg
(
ffmpeg
.input('/Users/…/….*.jpg', pattern_type='glob', framerate=24)
.output('movie.mp4')
.run()
)
Et voilà! I finally edited the video, added music and text in iMovie.
Update 2021-04-30

